
Quick links:
MANDATORY DESIGN REQUIREMENTS
| Spec | Requirement |
|---|---|
| Dimensions | 685 x 1063 px |
| Resolution | 300 DPI (Pixels/Inch) |
| File extension | .PNG or .JPEG / .JPG |
| Color Space | sRGB |
1. Fill the entire template area
Always cover the full template area with your design so there are no blank edges on the final product.
⚠️ If your image doesn't extend all the way to the edges of the template, parts of the wallet may remain unprinted, affecting the final look.
Pro Tip: If your design doesn't quite cover the whole area and you don't want to scale it up (to avoid cutting off important parts), try a "Mirror effect" on the sides to extend the design and cover the edges.
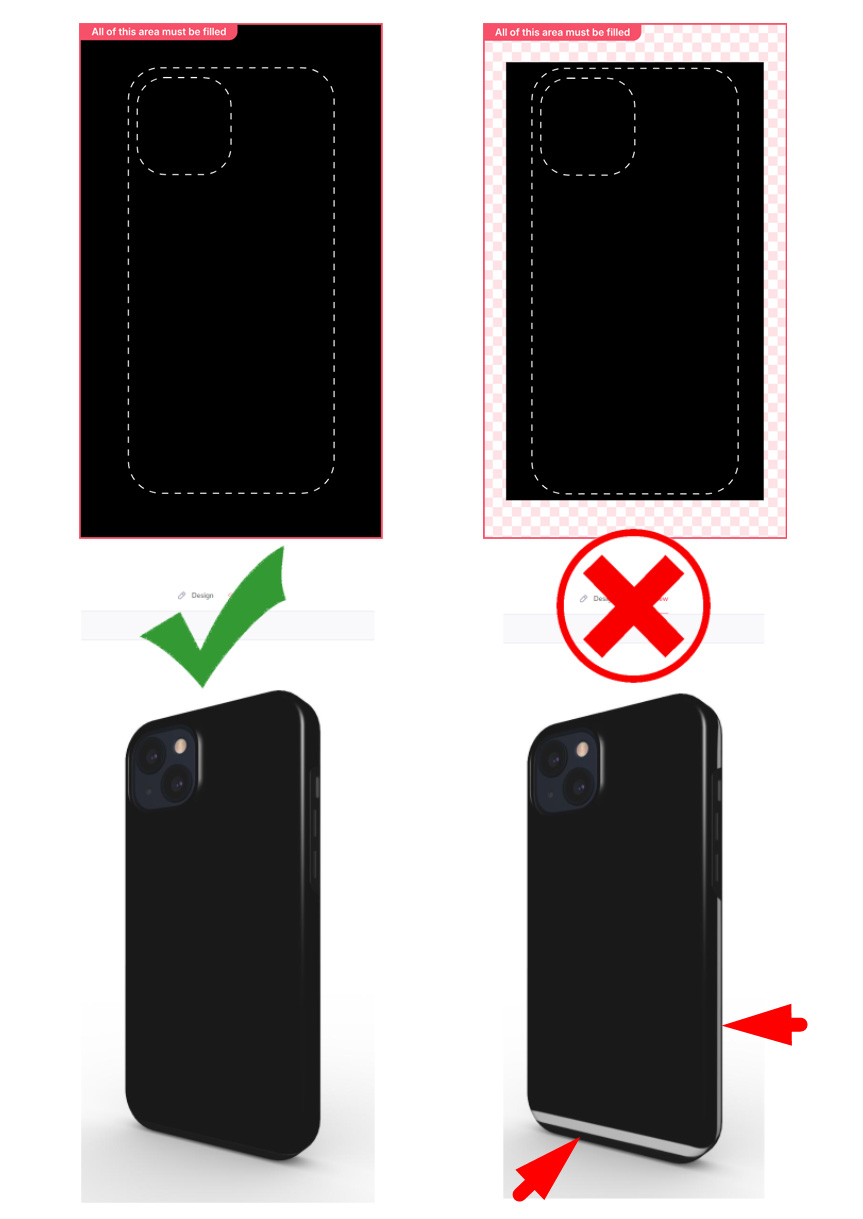
2. Keep important graphics in the safe area
Check the template for the safe area (dotted line) marks where your key elements will always stay visible. Keep logos, text, and any important graphics inside it.
3. Mind the camera crop area and logo placement
Please note the card output area on the template and position your brand logo so it stays clear of it. This keeps your design and your logo fully visible and unobstructed.
📌 Avoid placing important elements or your logo directly over the card output crop area, where they may be partially blocked.
4. Preview your design before saving
You can check how your design will look in two ways:
- On the Podbase platform: When creating a product, open the "Designing On" tab to see your design mapped onto the template.
- From Google Drive: Download the templates and mock-ups -> Mockups and Guidelines
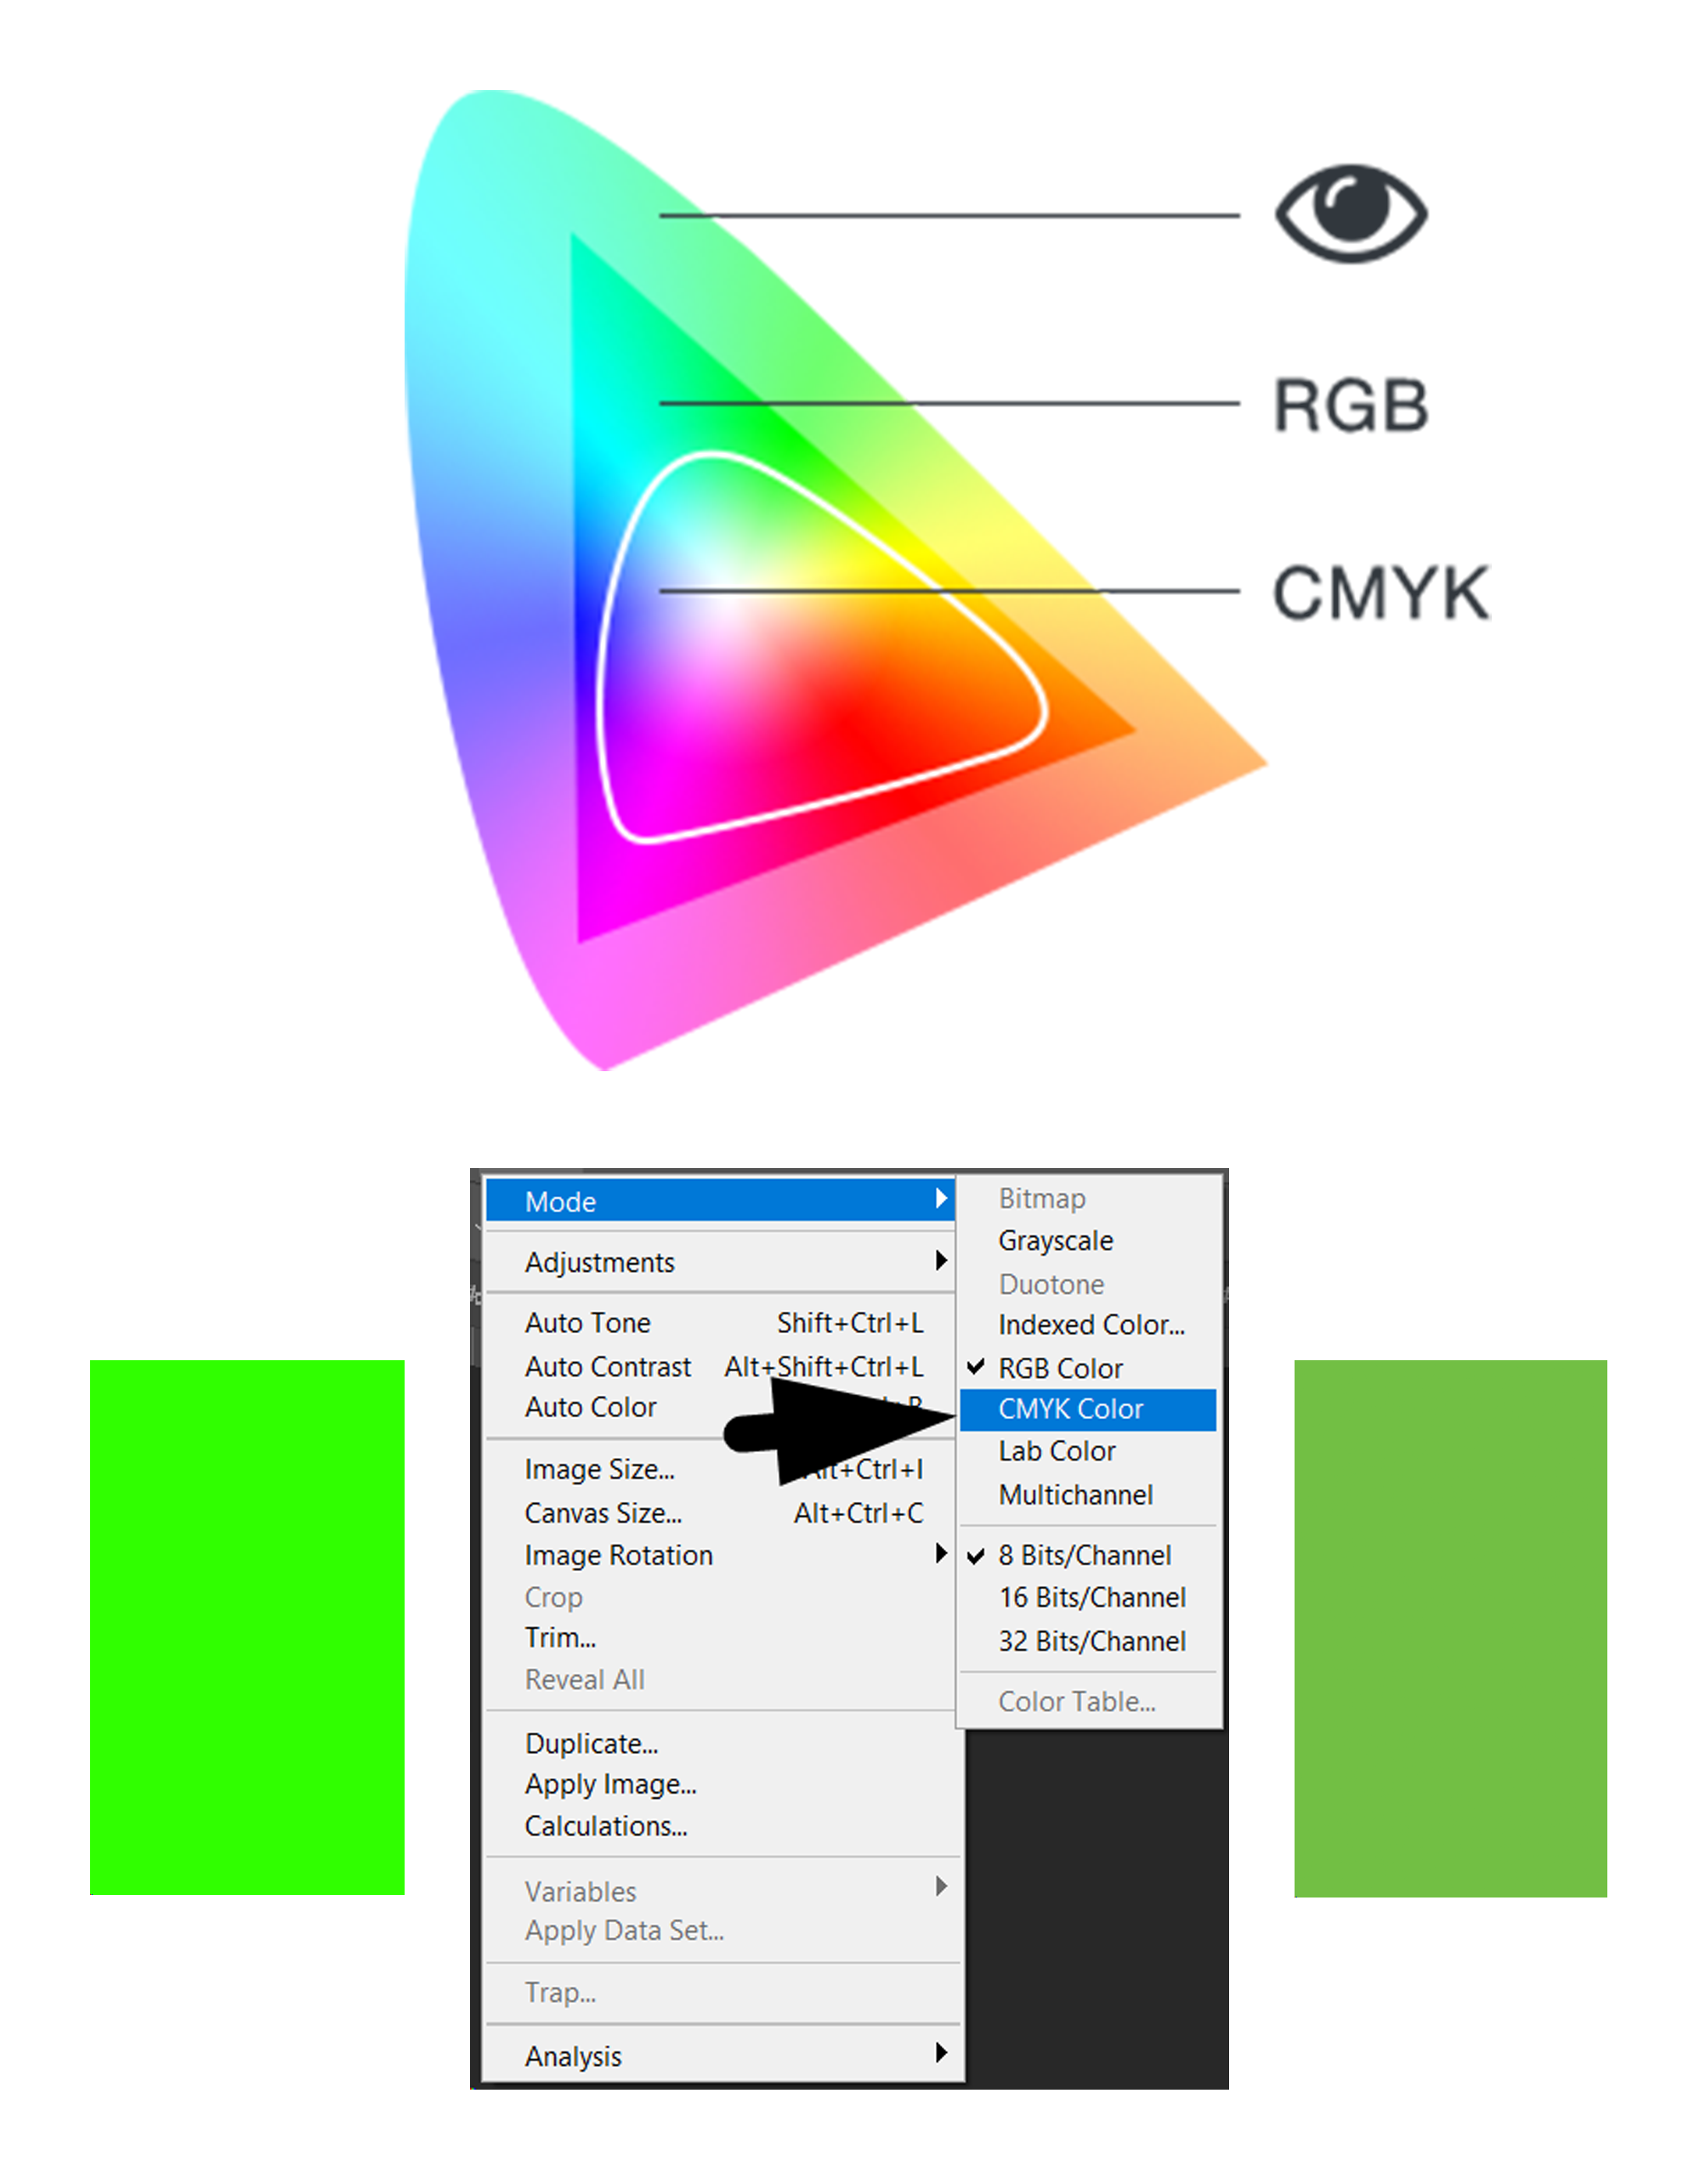
Color tips
Create your files in the sRGB color profile for accurate, consistent color across screens and print.
Pro Tip: Very bright neon colors don't always translate perfectly to print and may appear less vibrant on the final product. If your design relies on neon shades, preview them before saving to avoid surprises.
You're all set! 🎉
Still have questions? Reach out to our support team at support@podbase.com
Comments
0 comments
Please sign in to leave a comment.